lab05 : Image Manipulation
| num | ready? | description | assigned | due |
|---|---|---|---|---|
| lab05 | true | Image Manipulation | Fri 08/16 09:00AM | Fri 08/23 03:30PM |
If you find typos or problems with the lab instructions, please report them on Piazza
Learning Goals
In this lab you will manipulate and transform images. A key focus is to give you lots of practice with using loops, as well as seeing the practical implications of working with mutable data structures.
Your learning goals are:
- Import and export picture files in PIL
- Use your programming knowledge to manipulate pixels in picture files
- Implement algorithms to transform pictures
- Understanding how mutable data structures behave
- Dream up new creative image manipulations
Setting up your git repo for lab05 (with your partner)
This assignment consists of both individual and pair programming exercises. As in previous assignments, you will create only one private repository between the two of you. Following our naming convention, your repo should be called spis19-lab05-Name1-Name2. There is no starter code to import for this assignment. Go ahead and create this repo now on github (select .gitignore to include Python and add a README).
What comes next is the individual portion of the lab. The goal is for each of you to get familiar with the PIL library and how to work with images, before moving on to the pair programming portion of the assignment.
Individual portion: Getting familiar with PIL
This first part of the lab is individual. However, we want you to work next to your partner and support them as they go through these exercises. First, each of you should clone the private repo to their own account, following the instructions in lab02. In this individual lab portion, you will each create your own unique files and then add them to the shared repo.
Before you get started with programming, we need to point out one important fact. The goal of the lab is to practice coding, and specifically the use of (nested) loops and the intricacies of data referencing. For many of the tasks we ask you to do, there already exists a function in the PIL library that implements it. However, it is important you re-implement the functionality from ‘first principles’ so you get to practice and hone your programming skills. So implement the functions as we ask, don’t simply notice that a similar function already exists somewhere in a Python library.
Getting familiar with PIL
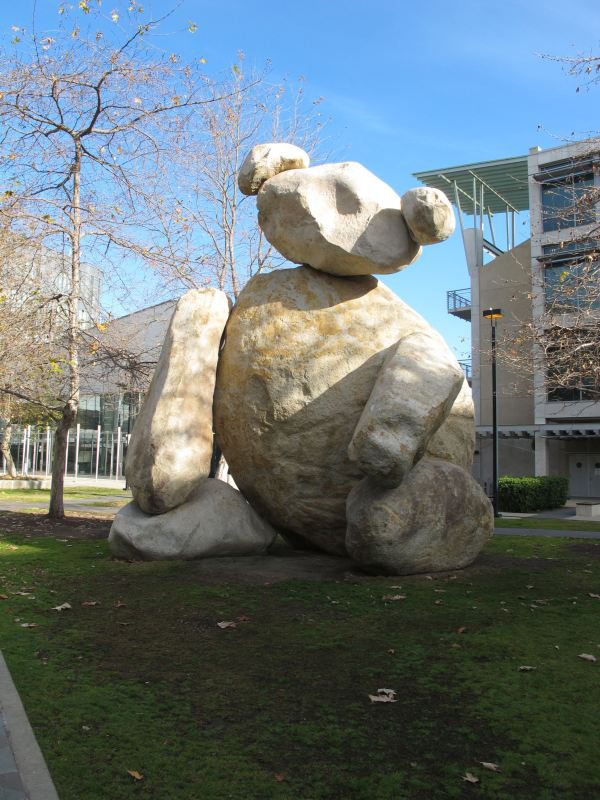
In this lab, we’ll work with the Python Imaging Library (PIL) which is a graphics library, like turle, but designed for working with image files. Download the picture below and store it in your github repo working directory for this lab (the one you cloned above). You can do this by right clicking on the image and selecting the option to save. Be sure to save the image as “bear.png”.
Next, go to the same directory where you stored the bear image and launch gVim. Create a new file and at the top of this file put a comment stating your name. Save this file as lab05Warmup_YourName.py where YourName is replaced with your first name.
In this file, write the following lines of code.
from PIL import Image

bear = Image.open( "bear.png" )

bear.show()
The first line instructs Python to import the Image portion of the PIL image library. Whenever you use a function from this library, it will start with Image., indicating you are looking for that function in this specific library. The next line of code opens an image and stores a reference to it in the bear variable.
If you are getting an error complaining that it does not know the “PIL” library, you may need to install it first. You do this by going to a command prompt and typing the following:
[sp19t1@ieng6-248]:~:14$ pip3 install --user pillow
Another error that may occur is that it cannot open the file “bear.png”. This happens when you either placed the file in the wrong place or launched gVim from a directory different from where the image was stored. You could resolve this issue by including the path (i.e., complete location in the directory structure), or by moving the file to the correct location.
Before you move on, add comments to your file to explain each line of code.
How many pixels is your image composed of? The following command could be helpful:
bear.size
Next, we are going to access a specific pixel from the image by using the getpixel() function. The arguments of this function are a picture object and the pixel’s X position and its Y position. The function returns the resulting pixel object. This pixel is a tuple representing the RGB values of the pixel (in the case below, at location x = 100 and y = 200).
pixel = bear.getpixel( ( 100, 200) )
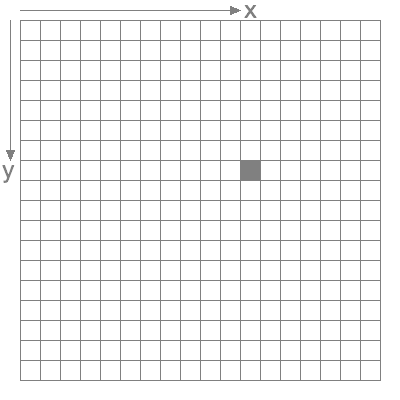
Note that in the image grid, the axis is a little different from the usual 2D Cartesian axis, in that it counts from upper left to bottom right. For example, in the following 18 x 18 image grid, the coordinate (11, 7) is the grey block. Note that the index starts at 0.
You can check the value of the pixel and verify it is a tuple of RGB values (3 numbers, one each for R, G and B), by adding this line of code to your Python file:
print(pixel)
Now that we have accessed a pixel, let’s see how to modify the colors of individual pixels in the image. To modify a pixel use the putpixel function
bear.putpixel( (100, 200), (0, 0, 0) )
The putpixel function modifies one pixel at a time and takes two arguments: (1) a pixel coordinate represented by an (x, y) tuple, in this case (100,200); and (2) a tuple representing the RGB color to set the pixel to, in this case color (0, 0, 0), i.e. black.
Add the putpixel command above to your code and check the bear image. Can you find the modified pixel at (100,200)? If you have a hard time seeing the modified pixel, try the following code instead to turn a range of pixels black. Make sure you understand what this code is doing.
for i in range(100):
    bear.putpixel( (i, 200) , (0, 0, 0) )
For detailed information on the functions we have used so far and the PIL library in general, you can check out the documentation for the Image module
Inverting the colors
Now, let’s try to modify our image in an interesting way. Way back in the days of film cameras and chemical processing of photo images, one step in the processing produced a negative image. We can achieve the negative (aka inverted effect) digitally by subtracting each of the original RGB values of a pixel from 255. For example, if the pixel RGB values are (34, 67, 87), the new RGB values of that same pixel should be (221, 188, 168), basically 255-34, 255-67, and 255-87. Of course, you need to do this not only for one pixel, but for all the pixels in the image.
Create a function invert there as shown below, which implements this operation for all pixels of an image. Also delete any code you no longer need. Note that the function below is incomplete. It is up to you to fill in the missing lines of codes.
def invert( im ):
    ''' Invert the colors in the input image, im '''

    # Find the dimensions of the image
    (width, height) = im.size

    # Loop over the entire image
    for x in range( width ):
        for y in range( height ):
            (red, green, blue) = im.getpixel((x, y))
            # Complete this function by adding your lines of code here.
            # You need to calculate the new pixel values and then to change them
            # in the image using putpixel()
Now add the required code to import the PIL library, open the “bear.jpg” image and call the invert function on the variable that points to this image.
invert(bear)
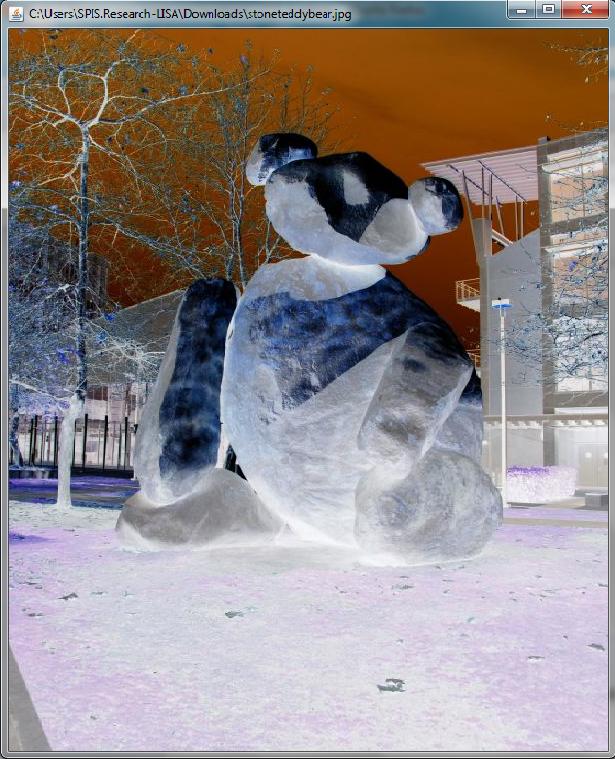
Basically, the code above calls the new function on a specific image (in this case, referenced by the variable bear). Finally, don’t forget to add a line of code to actually show the new image. When you now run the code, your result should look similar to this.
For this exercise and for all subsequent ones, make sure you test your code on the bear image, and at least one other image. We suggest using your own picture available in one your earlier git hub repos :)
Saving modified pictures
At the moment, you are only modifying a copy of the image that is stored in local memory. You are not actually changing the bear.jpg file, and any of the changes you make will not be saved when you exit Python. The reason is that the Python functions you’ve used are not directly processing the stone bear image on the hard disk. Rather, when you open an image, PIL makes a duplicate of that image and loads that duplicate copy into RAM memory. This technique of loading a copy of a file to memory (which is relatively fast) rather than directly handing a file on the disk (slow) is very common.
To save changes to disk, you should use the Image.save function. Read the documentation, mentioned earlier, to see how it works (hint: It takes one argument, which is a string specifying where you want the file saved including its name). Make sure you give this new file you save to a different name (i.e., don’t use bear.jpg), as we will be using the original file throughout this lab.
Add the save function to your code and test it.
Modifying only a part of the image
Next, create a new function in your file:
def invert_block( im ):
Its functionality should be the same as that of invert(), except that it only inverts the pixels that are in the upper right quadrant of the image (so only inverts 25% of the image) and leaves the others unchanged.
To test if it works, apply invert_block() to the bear image.
Now, what happens if you apply invert() first and then next apply invert_block() to the same image? Make sure you understand why this is happening. Confer with your partner.
Submit your code
Submit your code using the command line tools git add, git commit and git push. If your partner has already pushed to the git repo, you may get an error message if you try to push your changes as well. To resolve this, before you do git push, first do git pull origin master. This will make sure your local branch is up to date with the github master first. Verify that your code is pushed properly by navigating to your repo on github.com and viewing your latest changes.
At this point you are done with the individual portion. If your partner is not yet done DO NOT CONTINUE; instead have fun with creating new image transformations of your own. For example, what happens if you swap color channels (R becomes G, G becomes B, B becomes R)? What happens when you delete (i.e., set to 0) one or more of the color channels? Can you modify your code such that these transformations only apply to every other pixel rather than every pixel or to a specific area in your image? Check out some of the things that are possible at the end of this assignment under creative challenges, including greenscreen manipulations. You could be busy for many hours … However, once your partner finishes the individual portion, sync up again and start the pair programming portion of the lab. At the end, get back to creating new artistic image manipulations …
Pair programming portion: More advanced image manipulations
STOP! Do not start on this part of the lab until BOTH partners have completed the individual portion. When you do start, make sure you use pair programming
First, create a new Python file called “imaging.py” in your repo. You will place all the code of the pair programming exercises in this file. Make sure you add appropriate comments, including a header comment. For each exercise, come up with a solution outline by discussing with your partner. Don’t be in a hurry to start coding unless you have come to a fairly clear idea of a solution strategy and your first steps. Also, push your code to github regularly! This gives you an online copy to guard against accidentally deleting your work. Also, it is a good habit to get into.
Reducing the color space
Now that we have some experience changing the colors in a picture, we will continue with some more color manipulation examples that manipulate each pixel individually.
Greyscale
To create greyscale images, we make use of the concept of image luminance. In layman’s terms, luminance is how bright or dark the colors in a pixel are (compared to white). As Wikipedia calculates it, luminance is 21% red, 72% green, and 7% blue. Intuitively, this makes sense because if you think of standard red, green, and blue, green is the lightest and thus has highest positive impact luminance, while blue is darker and has a lower value for luminance.
Write a new function called greyscale that takes an image as a parameter and modifies it to make it greyscale. For this, you’ll want to do something similar to invert, except that we will first calculate the luminance of a pixel and then set each of the three color channels to this value. Since luminance is an indication of how white/black a pixel is, just insert the same value in each of the three color channels.

Hint: Getting an OverflowError: unsigned byte integer is greater than maximum? This might be because your luminance calculation results in RGB values higher than 255. Make sure that all of your percentages add up to 1. Also, if you get “integer argument expected, got float”, it may mean you are trying to assign red, green or blue a floating point value. You may solve this by using a typecast c = int(a/b) or doing an integer division c = a//b versus the floating point one c = a/b (See also integer division).
Binarize
Now, write a function called binarize(im, thresh, startx, starty, endx, endy), which modifies a portion of im to be black and white based on a threshold luminance value (thresh) specified by the user. This threshold is a brightness value between 0 and 255 - if a pixel’s luminance (see earlier) is greater than the threshold value, then it should turn white, and if it is less than the threshold value, then it should turn black. It should only apply this operation to pixels that are inside a box, where startx and starty represent the coordinates of the upper left corner of the box and endx and endy represent the x and y coordinates of the lower right corner. Your function should check that these numbers are valid (make sure your checks are complete!). If they are not, the function should not modify the image, but print a warning instead.
Did you push your code to github? It is a good idea to do this regularly.
Geometric transformations
The following functions take an image as an argument and do some geometric transformations on it.
Vertical mirroring
Write mirrorVert: This function takes an image and modifies the image to mirror the photo across its horizontal axis (i.e., so that the top part is mirrored upside down on the bottom of the image). Hint: Think carefully about which pixels you need to loop over, and where each pixel in the top half needs to be copied to create the mirror effect. Start with concrete examples. Then derive the general formula based on the pixel’s location (x, y) and the height and width of the image.
Horizontal mirroring
Write mirrorHoriz: Same as above, but mirroring across the vertical axis. Hint: Instead of replacing the bottom rows with the reversed top rows (as you did in mirrorVert), you’ll replace the last half of the pixels in every row with the reversed first half of the pixels.
Vertical flipping
Write flipVert, a function which flips the image in a picture along its horizontal axis (so the result is that the bottom is on the top and the top is on the bottom). Again, think carefully about where each pixel needs to end up, how far your loop needs to run, and be careful not to overwrite the pixels in the bottom half of your image before you’ve copied them over into the top!
When is the last time you pushed your code to github?
Geometric transformations returning a copy of the image
The next three methods operate differently from what we have done thus far. Instead of manipulating the original image, they will create a modified copy of the image and return it (i.e., use the return statement). They should NOT modify the original image.
The command below can be helpful. It creates a new image im, as a color image (this is what the RGB means), of a certain width and height given by the tuple.
im = Image.new('RGB',(width,height))
Scale
Function scale takes an image as a parameter and creates a copy of that image that is scaled to be half its original size. Then return this scaled copy (so you are going to have a return statement now). Hint: one way to do this is to skip every other pixel when copying from one image to the other. Be careful with your coordinates so that you do not go out of bounds in the smaller image.
Blur
Function blur also returns a modified copy of the image. This copy will be a blur of the original image, created by combining neighboring pixels in some way (entirely up to you). You might consider averaging the RGB values of a designated ‘square’ of pixels, then changing each of these pixels’ values to the average.
…. github!! …
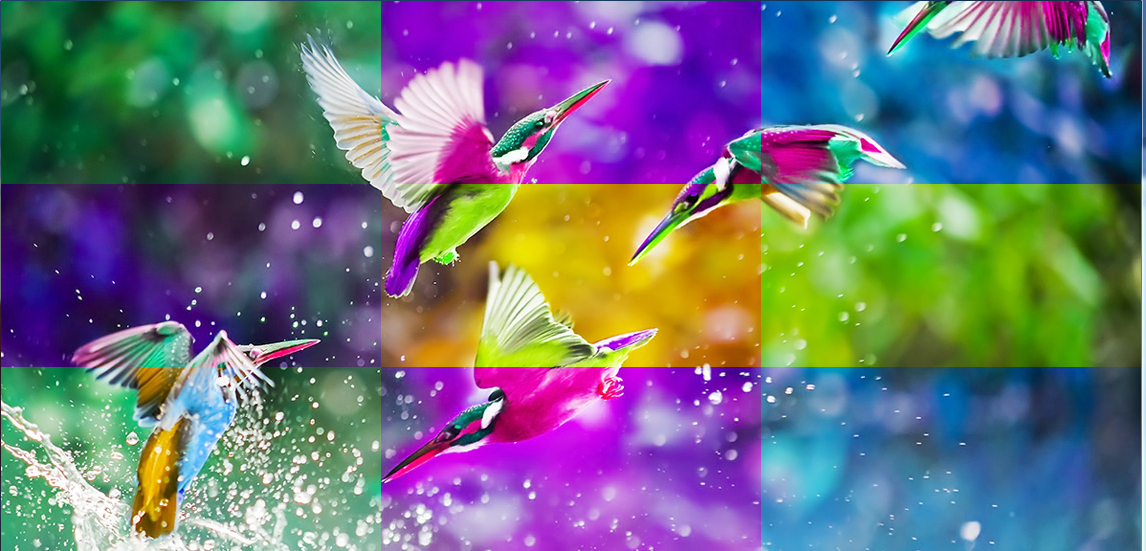
Random grid (challenge problem)
Function randomGrid also returns a copy of the original image. To create this copy it divides the image into an NxN grid (where the N is up to you, or make it an argument of the function) and randomly sorts the pieces of the grid across the image - “sliding puzzle”-style. Hint: you can use the random library (just google this).
import random
Submission
Submit the pair programming portion of your code, which should all be in the imaging.py file, to github using the usual git add, git commit, git push commands.
Challenge Problem 1 - Hiding images in plain sight
Steganography is a way to hide a secret message inside an ordinary file. There is a great article on BBC.com about this idea and how criminals may be using it.
For this challenge, you will hide a secret black-and-white image inside a standard image. The idea is to pick a color channel (R, G or B; the choice is yours) in the standard image. Let’s assume you chose to work with R. Each pixel has a value for R, which is between 0 and 255. The reason of this range is that it is represented by an 8-bit number. With 8-bits, we can represent numbers from binary 000000002 (0 in decimal) to 111111112 (255 in decimal). Now, imagine we have a pixel with an R value of 010111012 (93 decimal). Would you be able to tell the difference if I change that value to 010111002 (92 decimal)? Probably not. This is what we will use to hide our secret black-and-white image. We will take the R value of each pixel in the standard image and replace its least significant bit (i.e., the right-most bit if I were to write the value in binary) to either 0 or 1 based on whether the correspoding image in the secret message is black or white.
Basically, we are hiding the black-and-white image in the least significant bit of one of our color channels. To get the hidden message back, you simply need to check the least significant bit. A value of 0 means the hidden message has a black pixel there, while a 1 means it has a white pixel. Also note that having a least significant bit (LSB) of 0 means the number is even, and an LSB of 1 means the number is odd.
For the first part of this challenge, download the image below (“hiddenbear.png”). It has a secret message embedded inside its red color channel in the manner described above. Decode this message!
For the second part, write your own function to hide a secret message. Create a black-and-white image and hide it inside another image! You can extend your code to hide three images, one in each color channel.
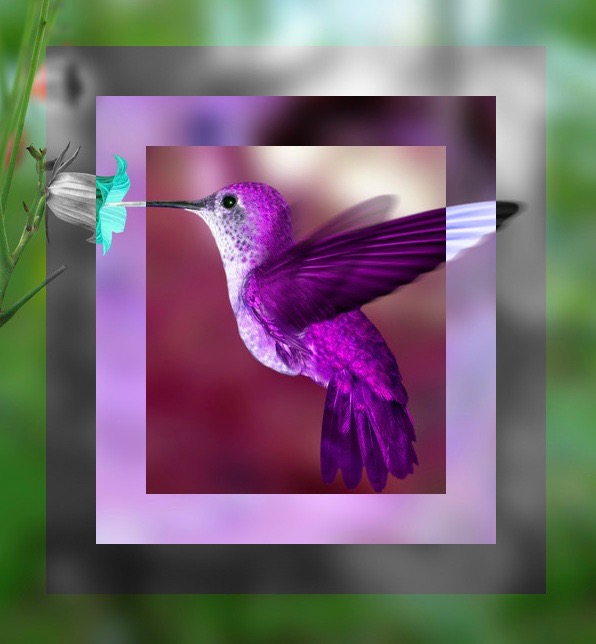
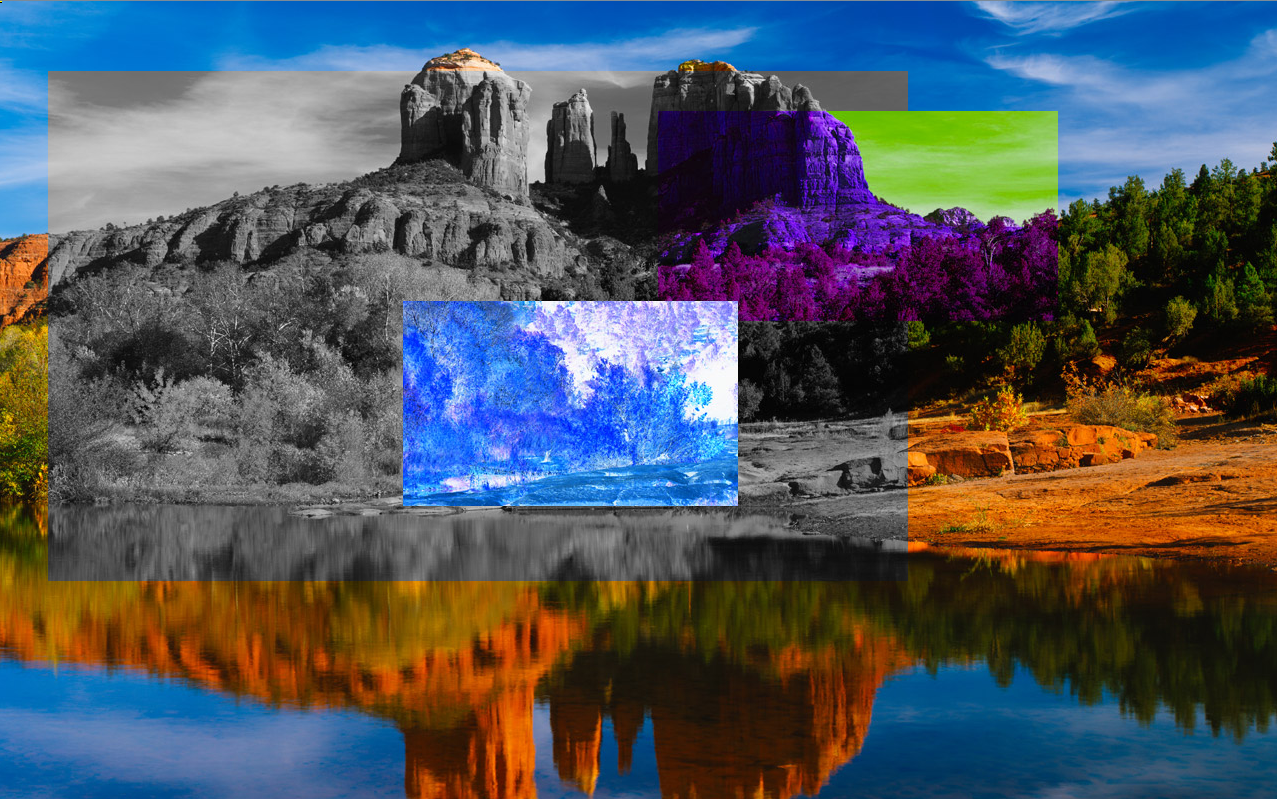
Challenge Problem 2 - Time to get creative
Now it’s time to create your own effects!! You can do them individually, as a pair, or with another partner if you wish (in which case, just select one of your repos and put in a header comment specifying who worked on this).
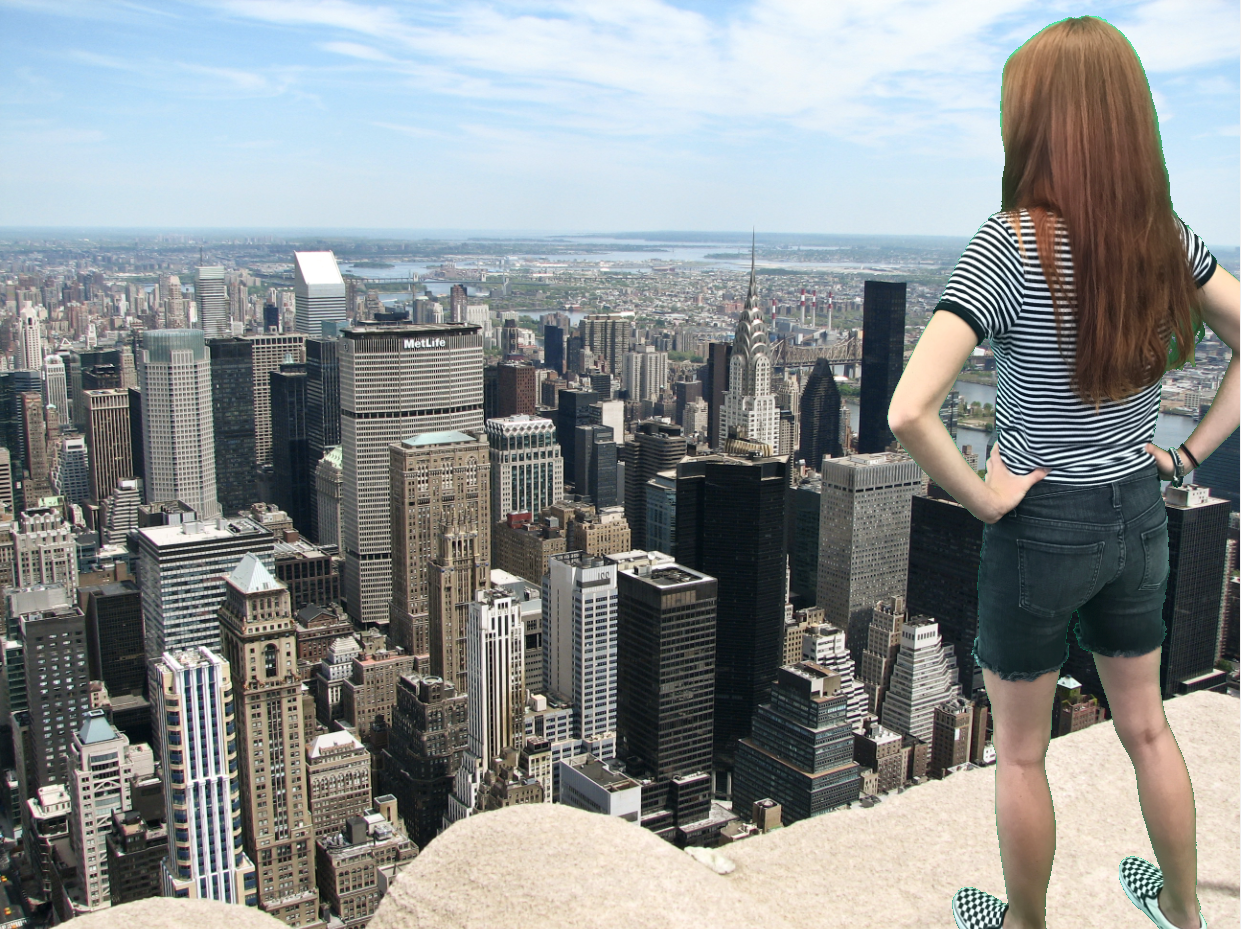
Create a new python file and be creative. Please be sure to include a comment or note to the tutors explaining what you did. There is literally no end to this assignment. Below you find some examples of what you can do (all of this was created with Python code, not Photoshop :-)
A really cool technique is the greenscreen (this is how the last image below was created). This lets you superimpose yourself onto any other image. Ever wanted a picture of yourself on Mt Everest or the moon? This is the way to do it. The way the greenscreen substitution works is that you need to identify all pixels that correspond to a range of green and then replace them with pixels from another image. We have a greenscreen available for you to play with. Just ask the mentors. Have fun!
Congratulations on finishing lab 5!!