There are several different scenarios for creating a github repo that you may need to use during SPIS.
This page contains an outline of several of these.
- Method 1: Create empty private repo for a lab, optionally adding starter code from a link
- Method 2: Create private repo for a lab, with README.md and Python .gitignore
- Method 3 Create private repo for APS writeups
Other github topics:
Method 1: Create empty private repo, optionally adding starter code from a link
We ask that you create a new private github repo inside the ucsd-cse-spis-2019 organization for each lab assignment. You and your partner will share the same repo by following these instructions
-
Navigate to the ucsd-cse-spis-2019 organization
-
Click on the “New repository” button to create a new repo as shown below (note that the github layout has changed somewhat; look for a green “New” button instead of the “New respository” button as show in the screenshot. Also, these screenshots are from 2016. Your screens should show 2019, of course.):
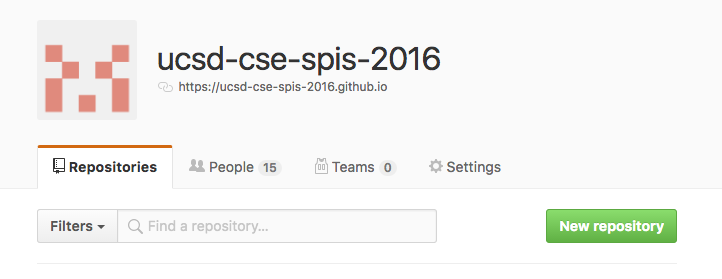
Be sure that the “owner” of the repository is ucsd-cse-spis-2019 as shown in the image, and NOT your own github account. If the owner shows as your own github id, you may have to change the pull down menu on the left where it says owner.
When creating your repo use the naming convention
spis19-labXX-<pair name>. Enter your pair name exactly as listed under thePair_Namecolumn at this link. For example, if you are creating a repo for lab04, and the name of your pair is Phill-Diba, then your repo should be named “spis19-lab04-Phill-Diba”. Select the “private” option when creating your repo to make sure your repo is only visible to the collaborators of the repo (you and your partner) and the course instructors. Click on the “Create repository” button. See the screenshot below: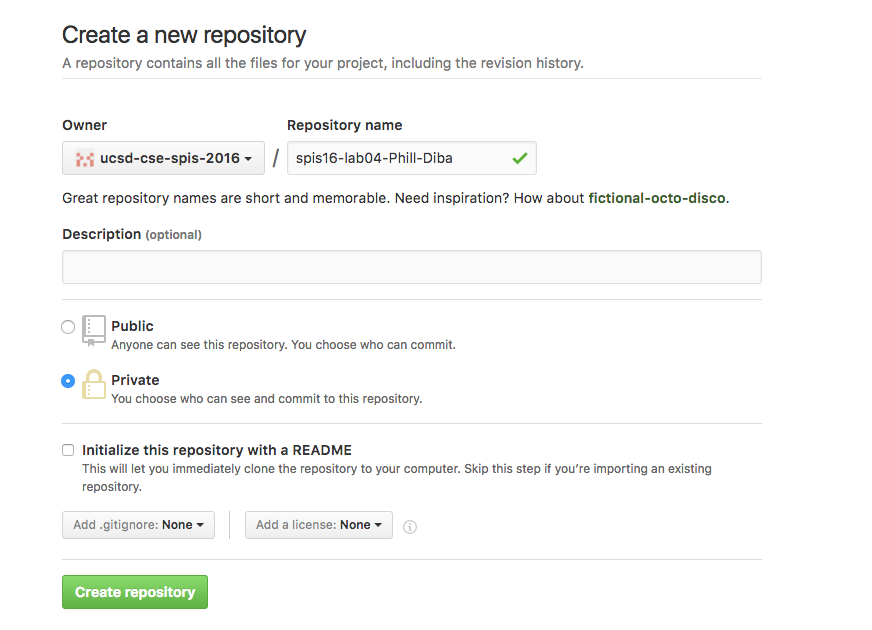
-
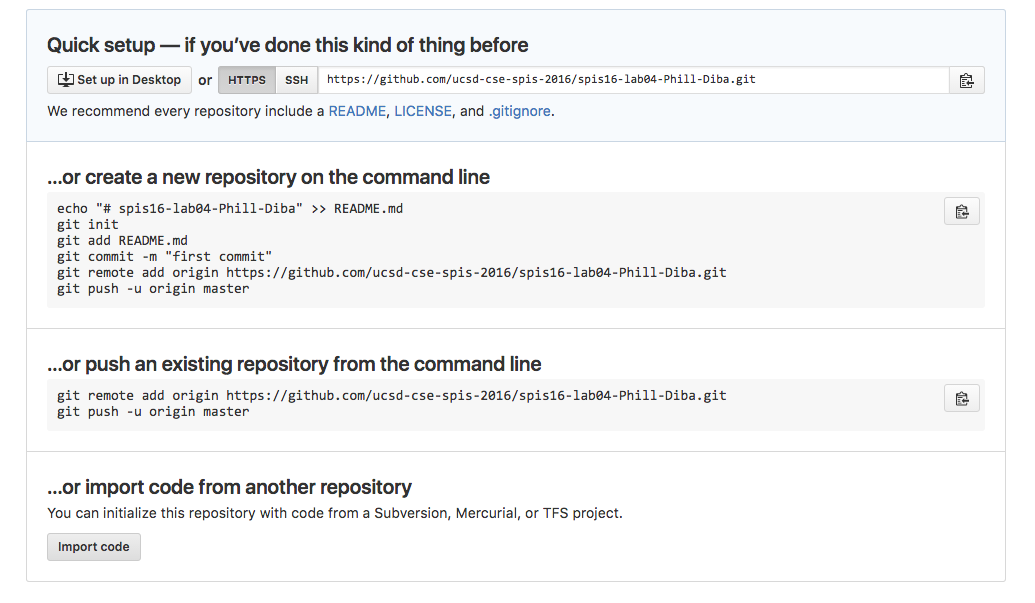
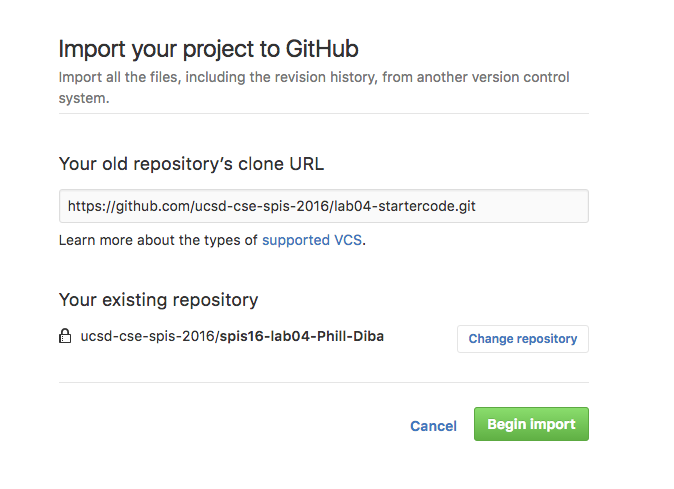
After you click “Create Repository”, you’ll see the following screen. For some labs we have provided you with some starter code. To obtain the starter code, click on the “import code” button on the screen that follows right after you create a new repo. Then provide the url of the repository that contains the starter code. This url should be specified in the assignment writeup. The screenshot below shows what you should expect to see if you were importing the starter code for lab04:
-
After you click the import code button, a screen will come up similar to the one below. You should have been given the URL of a repo for your starter code. Copy and paste that URL into the box labelled “Your old repository’s clone URL”. Then click the button labeled “begin import”.
-
Its now time to clone a copy of your repo on the computer where you intend to work. We strongly recommend that you create this clone on one of the ieng6 servers (e.g. ieng6-240.ucsd.edu). The process of creating a copy of your repo is called cloning because you not only get a replica of your code on a difference machine but can reflect changes made in one clone repo to any other clone using the mechanisms that Git provides. This is a key feature that essentially allows you to work on the same version of your code from any computer.
For now, we are interested in working on the
ieng6servers, so that’s where you will create the clone. To clone your repo navigate to your repo on github and click on the green “clone or download” button on the top right corner.Clicking on this link gives you either an ssh or https address that you will need in the cloning process clone. Copy the ssh address that starts with a
git@. See the screenshot below: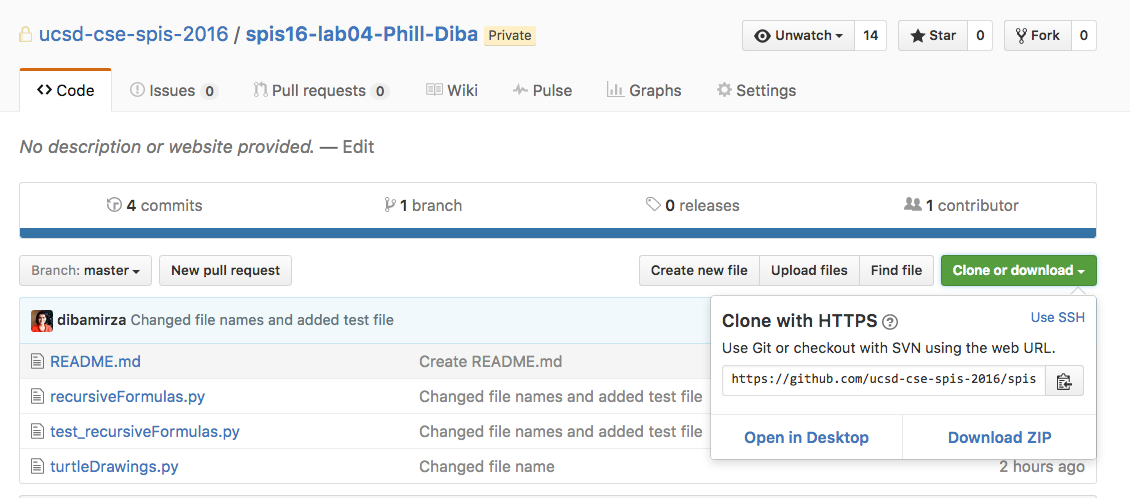
Log into your account on ieng6 and clone your newly created repo using the
git clonecommand as in the following example:$ git clone git@github.com:ucsd-cse-spis-2019/spis19-lab04-Phill-Diba.gitMake sure you provide the address to your repo instead of the one provided above. To check if your repo has been cloned correctly, type
lson the command prompt and you should see a directory with your repo name. Navigate into that directory using thecdcommand. For example if the directory name isspis19-lab04-Phill-Diba, at the command prompt typecd spis19-lab04-Phill-Diba
Submitting your code via github
We recommend that you keep your repo on the git server up to date with the latest version of your code. This allows your mentor to give you timely feedback as you progress through the assignments. To do this follow these steps:
-
Stage all the files that have changed using the command
git add file1.py file2.py ... filen.py -
Commit your changes using the command
git commit -m "message""message"should be a descriptive message about your commit. -
Push your changes to github by typing the command
git push origin masterYour changes will not be visible to your mentor unless you do this final step.
Method 2: Create private repo for a lab with README.md and Python .gitignore
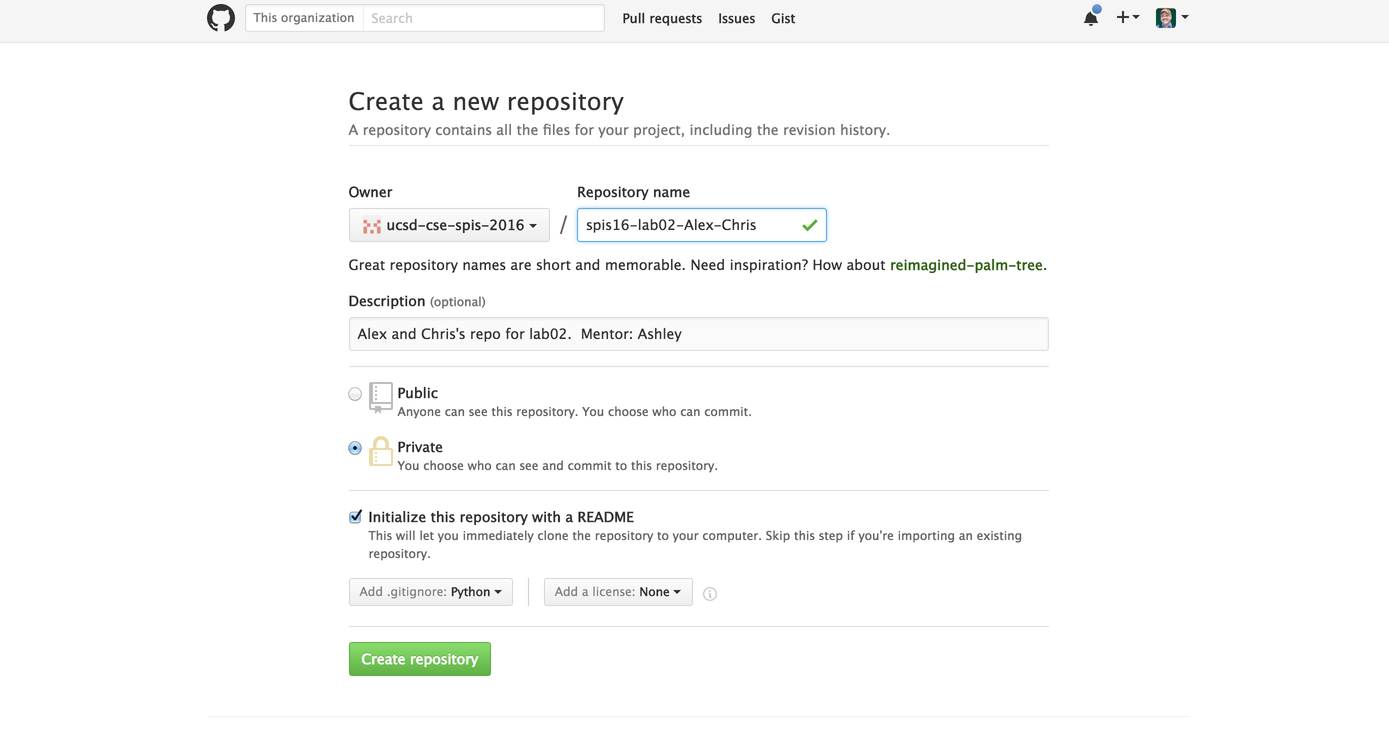
Sometimes when creating a repo from scratch for a lab, we want to set it up with a README.md and a .gitignore for Python, right from the start. The following diagram illustrates the steps involved.
You create a repo by selecting the small + sign with the triangle at the upper left corner of the github.com page, or simply by logging into github, then navigating to github.com/new
Then you see this screen, where you fill in the values as shown. Make sure you make your repo Private (not Public).
